Why ❓
Every summer I face the same problem: my parents go on vacation, and I inherit the noble responsibility of remembering to water their balcony flowers. And since I also have plants of my own that are sometimes drier than the Sahara Desert 🌵☀️, it was time to automate things.
When I started looking for a solution, I found plenty of projects using an ESP and a water pump, but almost all of them required separate power supplies for the ESP and the pump. As a total beginner in electronics, I decided to build my own custom setup from scratch, just to learn a thing or two along the way.
I also wanted to try building it with Flutter instead of Ionic/Angular. Since the ESP would be controlling the pump and acting as a web server, I needed a way to easily turn the pump on and off from my device.
Electronics 💡
Like I mentioned before, I’m a complete beginner in electronics, so this is just a straightforward explanation of what I used. I’m definitely not giving any advice here, so please do your own research if you’re thinking about building something similar.
-
The entire system is powered by a single 12V power supply. To safely power the ESP8266, a 7805 voltage regulator steps this 12V down to 5V.
-
The TIP122 transistor acts as a switch controlled by the ESP to turn the water pump on and off.
-
Multiple capacitors are used to smooth out voltage fluctuations and keep the power stable.
-
Resistors control the current flowing to different parts of the circuit, protecting components and ensuring proper operation.
-
Finally, LEDs provide simple visual feedback, showing when the pump is powered or when the circuit is active.
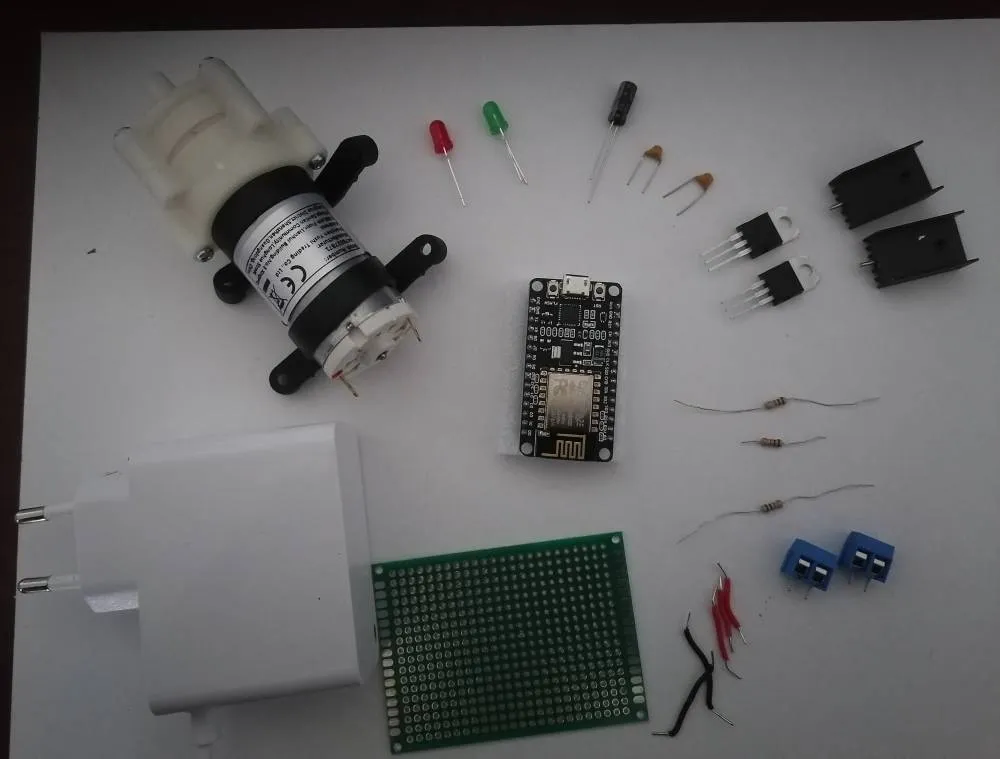
Here are all the components that made this little project possible—though a few of them ended up changing as the project evolved
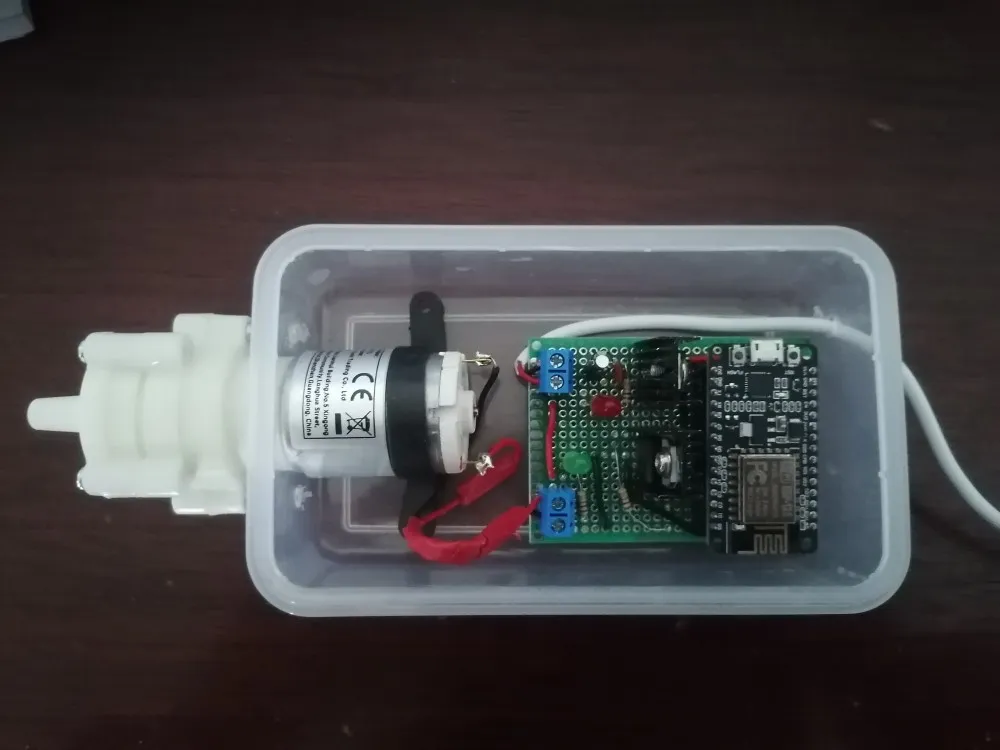
After connecting all the electronics and testing everything, the prototype finally came to life, better yet, came to life in a plastic meal container 😆, so it could safely stay outside without getting damaged by moisture
Coding & How It Works 💻
Here’s the big picture of how the system works:
The ESP8266 is the brain of the operation. It controls the water pump and also acts as a web server.
The Flutter app connects to the ESP’s web server over home Wi-Fi, letting you to controll the pump.
Features
Flutter App Features
- Test the ESP connection
- Manually toggle the pump
- Set Scheduler
ESP8266 Features
- Listens to requests from the Flutter app
- Saves and loads settings from EEPROM
- Controls the pump
- Sends responses back to Flutter
- Automaticaly starts the pump if scheduled
Flow Description
- Flutter App → ESP8266: User toggles pump or sets scheduler in the app.
- ESP8266 → EEPROM: Settings like start day, time, intervals, and duration are saved, so in case of shutdown they are restored from the storage.
- ESP8266 → Pump: ESP switches the TIP122 transistor to turn the pump on or off.
- ESP8266 → Flutter App: ESP sends back confirmation or status updates
Scheduler ⏰
When the ESP device starts, the Flutter app sends the current time, which the ESP stores in EEPROM to keep track. The pump schedule uses just three parameters: start day, start time, and interval, along with a configurable runtime for each cycle.
The PumpScheduler checks once per minute whether the pump should run. If the current day and time match the schedule, the pump activates for the set duration.
Flutter App 📱
At first, the app had a very simple structure, but I quickly realized that passing data around widgets would get messy 😅. To solve this, I implemented Riverpod, which made state management much easier.

Next Steps / To-Do ✅
Before moving on, here’s what’s definitely on my list:
- Wi-Fi Provisioning 📶
- Improve user experience 📱
- Next steps will focus on adding real-time communication and monitoring. I plan to integrate WebSockets, MQTT for live updates and connect the system to a database with logging, so the app can track pump activity, schedule history, and system status more reliably.
Conclusion ✨
Now I have my lazy way of watering the plants, and at the same time, an interesting project to improve and expand over time. Need to add additional pump for the garden also
You don’t even want to know about my hydroponics project 😆